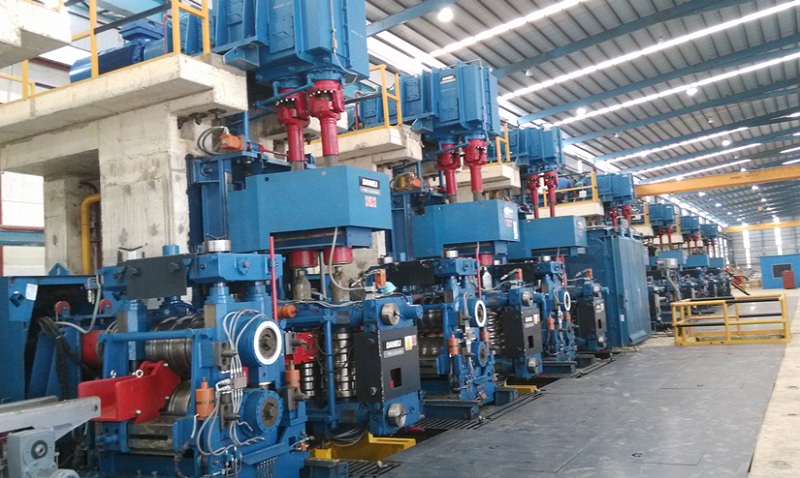
In the modern production of bars and wire rods, ال short stress rolling mill (short stress path rolling mill) has become the dominant equipment choice. Its popularity stems from a high-rigidity design that ensures high-precision products, coupled with the ability to handle large rolling forces. لكن, the true efficiency of this equipment depends heavily on how well the rolls and bearings are maintained and installed.
For production managers and maintenance teams, mastering the installation process is not just about fixing a part; it is about reducing downtime and ensuring the quality of the steel. Below is a comprehensive guide on the operational standards for replacing rolls and bearings, integrating practical experience with technical requirements.
Understanding the Assembly Structure
Before starting the disassembly, it is crucial to understand that a short stress rolling mill relies on a loop of stress that is significantly shorter than traditional housing mills. This means the connection between the roll, the bearing housing, and the tie rods is extremely tight. Any misalignment during installation will directly affect the “stress path,” leading to product deviation.
Step-by-Step Disassembly Procedure
When the roll pass is worn out and requires replacement, follow this strict sequence to ensure safety and prevent damage to components.
1. Releasing the Tie Rod Mechanism
The first step involves loosening the hinged bolts. These bolts are responsible for locking the tie rod device to the base. Do not attempt to force the unit out before these are fully disengaged. This releases the tension in the system, allowing the assembly to be moved.
2. Securing for Safety
Once the tie rod device is removed from the mill stand, it must be transported to a dedicated loading/unloading platform.
Critical Safety Note: Ensure the device is firmly fixed on the platform. The assembly is heavy and can shift unexpectedly during roll extraction.
3. Component Marking and Cap Removal
Before pulling anything apart, remove the pressure covers (end caps) at both ends of the roll.
The “Golden Rule” of Maintenance: Always mark the connection points. Use a paint marker or stamp to number the bearing housings relative to the shaft. Short stress rolling mills require precise alignment; mixing up the drive-side and operation-side housings can lead to assembly difficulties later.
4. Roll Extraction and Bearing Assessment
Extracting the roll is a delicate process. Because the mill operates at high speeds and under heavy loads, the bearings may have generated significant heat. This often leads to the inner race of the bearing “hugging” or seizing slightly against the journal.
- Inspect the bearing condition immediately upon exposure.
- If resistance is felt, do not use percussive force (hammers). بدلاً من, use a hydraulic removal tool or pressure auxiliary equipment to slowly push the roll out.
- Check for signs of “fretting corrosion” on the roll neck, which indicates loose fits during operation.
Installation of New Rolls and Bearings
The lifespan of a short stress rolling mill is determined during the installation phase. Cleanliness and precision are your primary tools here.
Pre-Installation Checklist: Never install a new roll into a dirty housing. The inner cavity of the bearing seat must be thoroughly cleaned of old grease, oil sludge, and metallic dust. Even a 0.1mm particle can cause uneven loading on the bearing.
Apply a thin layer of engineering-grade lubricant to the roll neck and the bearing inner race. Slowly guide the new roll into the assembly. If you encounter resistance, stop and check for alignment; forcing it will damage the expensive four-row cylindrical bearings commonly used in these mills.
Technical Reference: Bearing & Clearance Parameters
To ensure the rolling mill operates without vibration, adherence to specific tolerance parameters is required. Below is a reference table for typical bearing clearances suitable for rod and bar mills.
| عنصر / Checkpoint | التسامح النموذجي / Action | ملحوظات |
|---|---|---|
| Radial Internal Clearance | C3 or C4 Specification | Depends on operating temp. Higher temp needs C4. |
| Roll Neck Fit | g6 or h6 | Must allow for thermal expansion. |
| Axial Play (Thrust) | 0.20 - 0.40 مم | Adjusted via end cap gaskets. |
| Grease Fill Rate | 30% - 50% of cavity | Over-greasing causes overheating. |
Optimizing for Long-Term Performance
The installation is only the beginning. To maximize the ROI on your short stress rolling mill, consider these operational insights:
1. The “Break-In” Myth
Unlike car engines, rolling mill bearings do not need a break-in period, but they do need thermal stabilization. Monitor the temperature closely for the first 2 hours after a roll change. A rapid spike indicates either too much grease or a misaligned axial clamp.
2. Axial Adjustment Matters
In short stress mills, the axial adjustment mechanism is compact. Ensure the threads on the adjustment rod are clean and lubricated with molybdenum disulfide paste. If these threads seize, precise roll gap adjustment becomes impossible, directly affecting the dimensional accuracy of the steel bar.
3. Water Cooling Seals
Water ingress is the number one killer of mill bearings. During the roll change, always replace the V-rings or oil seals. Reusing an old seal to save a few dollars puts the entire bearing assembly at risk of emulsification, where water mixes with oil and destroys the lubrication film.
By adhering to these rigorous installation and maintenance protocols, manufacturers can ensure their rolling mills operate at peak efficiency. Regular training for the maintenance crew on these specific steps—from the initial loosening of bolts to the final grease application—creates a culture of precision that pays dividends in production volume and equipment longevity.